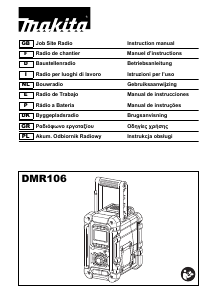
Bedienungsanleitung Makita DMR106 Radio

Benötigen Sie ein Bedienungsanleitung für Ihren Makita DMR106 Radio? Unten können Sie das PDF-Bedienungsanleitung kostenlos auf Deutsch ansehen und herunterladen. Für dieses Produkt gibt es derzeit 2 häufig gestellte Fragen, 0 Kommentare und 2 Stimmen mit einer durchschnittlichen Produktbewertung von 100/100. Wenn dies nicht das von Ihnen gewünschte Bedienungsanleitung ist, kontaktieren Sie uns bitte.

Ist Ihr Produkt defekt und bietet die Bedienungsanleitung keine Lösung? Gehen Sie zu einem Repair Café, wo es gratis repariert wird.

Bedienungsanleitung

Loading…

8
Display modes – FM
Your radio has a range of display options for FM radio
mode.
1. Repeatedly press the Menu/Info button to view
the RDS information of the station you are listening to.
a. Station name Displays the name if the station being
listened to.
b. Program type Displays the type of station being
listened to such as Pop, Classic,
News, etc.
c. Radio text Displays radio text message such as
new items etc.
d. Year/Day Displays the year and day of the
week according to the date setting of
your radio.
e. Date/Day Displays the date and day of the
week according to the date setting of
your radio.
f. Frequency Displays the frequency of the FM for
the station listened to.
FM stereo (auto)/mono
If the FM radio station being listened to has a weak signal
some hiss may be audible. It is possible to reduce this
hiss by forcing the radio to play the station in mono rather
than stereo.
1. Press the Power button as needed to select the
FM band and tune to the desired FM station as
previously stated.
2. Press and hold Menu/Info button to enter the
menu setting.
3. Rotate the Tuning control knob until the FM Auto/
mono setting shows on the display. If the setting is
Auto press the Tuning control knob to switch to Mono
mode to reduce the hiss. Press the Tuning control
knob to select the option.
Recalling a preset in AM/FM mode
1. Press the Power button to switch on your radio.
2. Press the Source button to select AM or FM radio
mode.
3. Momentarily press the required Preset button
to cause your radio to tune to one of
the stations stored in the preset memory.
Clock and Alarms
Setting the time and date format
The clock display used in stand-by mode and on the
playing mode screens can be set to different format. The
selected format is then also used when setting the alarms.
1. Press and hold the Menu/Info button to enter the
menu setting.
2. Rotate the Tuning control knob until “CLOCK xxH”
appears on the display and press the Tuning control
knob to enter the setting. You will see the time
format begins to flash.
3. Rotate the Tuning control knob to select either 12
or 24 hour format. Press the Tuning control knob to
confirm your choice of clock format.
Note: If the 12 hour clock format is chosen, the radio
will then use the 12 hour clock for the setting.
4. Press and hold the Menu/Info button to enter the
menu setting.
5. Rotate the Tuning control knob until a date (e.g.
THU APR 3) appears on the display and press the
Tuning control knob to enter the setting. You will
see the date format begins to flash.
6. Rotate the Tuning control knob to select the
desired date format. Press the Tuning control knob
to confirm your choice.
Setting the clock time and date
1. Press and hold the Menu/Info button .
2. Rotate the Tuning control knob until “CLOCK ADJ”
appears on the display. Press the Tuning control knob
to enter the setting.
3. The hour setting on the display will begin flashing.
Rotate the Tuning control knob to select the
desired hour, and press the Tuning control knob to
confirm the setting. Then rotate the Tuning control
knob to select the desired minute, and press the
Tuning control knob to confirm the setting.
4. Rotate the Tuning control knob until “DATE ADJ”
appears on the display. Press the Tuning control knob
to enter the setting.
5. Rotate the Tuning control knob to select the
desired year and press the Tuning control knob to
confirm the setting. Then rotate the Tuning control
knob to select the desired month, and press the
Tuning control knob to confirm the setting. Then
rotate the Tuning control knob to select the desired
date and press the Tuning control knob to confirm
the setting.
Radio Data System (RDS)
When you set the clock time using the RDS function, your
radio will synchronize its clock time whenever it tunes to a
radio station using RDS with CT signals.
1. When tuning to a station transmitting RDS data, press
and hold the Menu/Info button .
2. Rotate the Tuning control knob until “RDS CT” and
a clock symbol appear on the display. Press the
Tuning control knob to enter the setting.
3. Rotate the Tuning control knob until “RDS CT”
appears on the display. Press the Tuning control knob
to confirm the setting. The clock time of the radio
Download Bedienungsanleitung auf Deutsch (PDF, 1.21 MB)
(Denken Sie an die Umwelt und drucken Sie diese Bedienungsanleitung nur aus, wenn es unbedingt nötig ist)

Loading…

Bewertung

Teilen Sie uns mit, was Sie über die Makita DMR106 Radio denken, indem Sie eine Produktbewertung verfassen. Möchten Sie Ihre Erfahrungen mit diesem Produkt teilen oder eine Frage stellen? Hinterlassen Sie einen Kommentar am Ende dieser Seite!
Sind Sie mit Makita DMR106 Radio zufrieden?
Ja Nein
100%
0%
2 Bewertungen

Diskutieren Sie über dieses Produkt mit

Hier können Sie uns Ihre Meinung zu Makita DMR106 Radio mitteilen. Wenn Sie eine Frage haben, lesen Sie zunächst das Bedienungsanleitung sorgfältig durch. Die Anforderung eines Bedienungsanleitung kann über unser Kontaktformular erfolgen.

Mehr zu diesem Bedienungsanleitung

Wir verstehen, dass es schön ist, ein gedrucktes Bedienungsanleitung für Ihr Makita DMR106 Radio zu haben. Sie können das Bedienungsanleitung jederzeit von unserer Website herunterladen und selbst ausdrucken. Wenn Sie ein Originalhandbuch wünschen, empfehlen wir Ihnen, Makita zu kontaktieren. Möglicherweise können sie ein Originalhandbuch bereitstellen. Suchen Sie das Bedienungsanleitung Ihres Makita DMR106 Radio in einer anderen Sprache? Wählen Sie auf unserer Homepage Ihre bevorzugte Sprache und suchen Sie nach der Modellnummer, um zu sehen, ob wir sie verfügbar haben.

Spezifikationen

Marke Makita
Modell DMR106
Kategorie Radios
Dateityp PDF
Dateigröße 1.21 MB

Alle Anleitungen für Makita Radios
Weitere Anleitungen von Radios

Häufig gestellte Fragen zu Makita DMR106 Radio

Unser Support-Team sucht nach nützlichen Produktinformationen und beantwortet Ihre häufig gestellten Fragen. Sollte Ihnen ein Fehler bei den häufig gestellten Fragen auffallen, teilen Sie uns dies bitte anhand unseres Kontaktformulars mit.

Was ist DAB+? Verifiziert

DAB+ ist der Nachfolger des FM-Signals und steht für "Digital Audio Broadcasting". Es ist ein digitales Signal, das mehrere Kanäle innerhalb der gleichen Bandbreite ermöglicht und ein einfacheres Umschalten zwischen den Kanälen ermöglicht.

Das war hilfreich (251) Mehr lesen

Worin besteht der Unterschied zwischen FM und AM? Verifiziert

FM und AM sind beides Modulationsarten, die zur Übertragung eines Signals verwendet werden. FM steht für "Frequency Modulation" und AM für "Amplitude Modulation". AM ist die älteste Form der Modulation. Der größte Unterschied ist, dass das FM-Signal viel stärker ist als das AM-Signal.

Das war hilfreich (192) Mehr lesen
Bedienungsanleitung Makita DMR106 Radio

Verwandte Produkte

Verwandte Kategorien