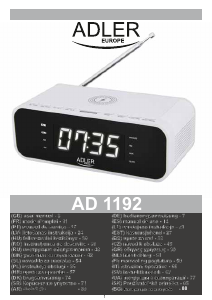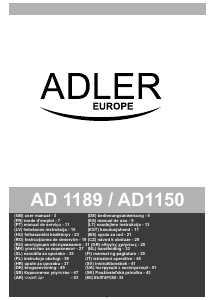
Bedienungsanleitung Adler AD 1192W Uhrenradio

Benötigen Sie ein Bedienungsanleitung für Ihren Adler AD 1192W Uhrenradio? Unten können Sie das PDF-Bedienungsanleitung kostenlos auf Deutsch ansehen und herunterladen. Für dieses Produkt gibt es derzeit 3 häufig gestellte Fragen, 0 Kommentare und 0 Stimmen. Wenn dies nicht das von Ihnen gewünschte Bedienungsanleitung ist, kontaktieren Sie uns bitte.

Ist Ihr Produkt defekt und bietet die Bedienungsanleitung keine Lösung? Gehen Sie zu einem Repair Café, wo es gratis repariert wird.

Bedienungsanleitung

Loading…

5
5. Press the PRE. Button (9). To confirm your choice.
4. You can change the preset number by pressing the Skip – and Skip + button (7,8).
3. Press the PRE. Button (9).
2. The device will turn on the radio function.
1. Turn the device on by pressing the On/ Off button (2) once.
Automatic radio station setup to preset stations:
5. Once the device has covered all of the frequencies the radio will stop searching.
4. The radio will start to search for radio signals and assign presets numbers to the found station.
3. Press and hold for at least 3 seconds the CLK./MEM. Button (3).
2. The device will turn on the radio function.
1. Turn the device on by pressing the STANDBY / FUNCTION button (2) once.
Automatic frequency finding and assigning presets to each signal:
6. Control the music playback with your playback device.
5. After pairing the device is ready to play.
4. Find on your playback device the “AD 1192” and press PAIR.
3. The device will be in “Pairing” mode.
2. Press the STANDBY / FUNCTION button (2) again to change to the Bluetooth function.
1. Turn the device on by pressing the STANDBY / FUNCTION button (2) once.
Bluetooth function:
3. Press the the Vol-/Vol+ / Al.1/Al.2 Button (4,5) buttons to change the volume UP or DOWN.
2. The device will turn on the radio function.
1. Turn the device on by pressing the STANDBY / FUNCTION button (2) once.
6. The device will switch to the frequency assigned to the preset.
Manual setting of the preset number to the radio station.
3. Change the frequency by pressing the SCAN – and SCAN + button (7,8).
2. The device will turn on the radio function.
1. Turn the device on by pressing the STANDBY / FUNCTION button (2) once.
4. Press the CLK./MEM. Button (3) once.
5. By using the SCAN – and SCAN + button (7,8) choose the desired preset number.
6. Press the CLK./MEM. Button (3) once to confirm your choice.
Choosing the preset radio station:
1. Turn the device on by pressing the STANDBY / FUNCTION button (2) once.
2. The device will turn on the radio function.
3. Press the SLEEP/PRESET Button (9).
4. PX will show. Where the X is the number of the station.
5. Press the SLEEP/PRESET Button (9) repeatedly to choose the desired preset number.
6. The radio will change to the frequency assigned to the number chosen.
AUX playback:
1. Turn the device on by pressing the On/ Off button (2) once.
2. Press the STANDBY / FUNCTION button (2) twice to change to the AUX-IN function, the display will show “AU”.
3. Connect the device via the AUX port (15) on the back.
4. The device will automatically change to the AUX function.
5. Change the tracks on the playback device.
6. You can change the volume of the music by using the playback device or the Vol-/Vol+ / Al.1/Al.2 Button (4,5) buttons to change the
volume UP or DOWN.
USB Port charging:
1. Plug the device to the mains power.
2. Using an USB cable insert one side of the cable into the USB port (16) at the back of the radio.
3. Once done, unplug the USB cable.
Wireless charging:
1. Plug the device to the mains power.
2. Remove your phone from its case.
3. Put your phone that has the ability to be charged wirelessly.
4. Put the phone on the upper part of the device marked with the Lightning / Charging logo.
5. Once the phone has finished charging please remove it from the device.
Please note the thickness of your charging case. If the case is thicker than 5mm the charger will not work properly.
Due to the interference from wireless charging, the wireless charging function will be suspended under the FM radio mode.
Please use the USB charger slot to charge your device under the FM radio mode.
Cleaning and Maintenance:
1. Unplug the device from the mains power.
Download Bedienungsanleitung auf Deutsch (PDF, 3.05 MB)
(Denken Sie an die Umwelt und drucken Sie diese Bedienungsanleitung nur aus, wenn es unbedingt nötig ist)

Loading…

Bewertung

Teilen Sie uns mit, was Sie über die Adler AD 1192W Uhrenradio denken, indem Sie eine Produktbewertung verfassen. Möchten Sie Ihre Erfahrungen mit diesem Produkt teilen oder eine Frage stellen? Hinterlassen Sie einen Kommentar am Ende dieser Seite!
Sind Sie mit Adler AD 1192W Uhrenradio zufrieden?
Ja Nein
Seien Sie die erste Person, die dieses Produkt bewertet
0 Bewertungen

Diskutieren Sie über dieses Produkt mit

Hier können Sie uns Ihre Meinung zu Adler AD 1192W Uhrenradio mitteilen. Wenn Sie eine Frage haben, lesen Sie zunächst das Bedienungsanleitung sorgfältig durch. Die Anforderung eines Bedienungsanleitung kann über unser Kontaktformular erfolgen.

Mehr zu diesem Bedienungsanleitung

Wir verstehen, dass es schön ist, ein gedrucktes Bedienungsanleitung für Ihr Adler AD 1192W Uhrenradio zu haben. Sie können das Bedienungsanleitung jederzeit von unserer Website herunterladen und selbst ausdrucken. Wenn Sie ein Originalhandbuch wünschen, empfehlen wir Ihnen, Adler zu kontaktieren. Möglicherweise können sie ein Originalhandbuch bereitstellen. Suchen Sie das Bedienungsanleitung Ihres Adler AD 1192W Uhrenradio in einer anderen Sprache? Wählen Sie auf unserer Homepage Ihre bevorzugte Sprache und suchen Sie nach der Modellnummer, um zu sehen, ob wir sie verfügbar haben.

Spezifikationen

Marke Adler
Modell AD 1192W
Kategorie Uhrenradios
Dateityp PDF
Dateigröße 3.05 MB

Alle Anleitungen für Adler Uhrenradios
Weitere Anleitungen von Uhrenradios

Häufig gestellte Fragen zu Adler AD 1192W Uhrenradio

Unser Support-Team sucht nach nützlichen Produktinformationen und beantwortet Ihre häufig gestellten Fragen. Sollte Ihnen ein Fehler bei den häufig gestellten Fragen auffallen, teilen Sie uns dies bitte anhand unseres Kontaktformulars mit.

Wofür stehen AM und PM? Verifiziert

AM steht für "Ante Meridiem" und bezeichnet die Zeit vor Mittag. PM steht für "Post Meridiem" und bezeichnet die Zeit nach Mittag.

Das war hilfreich (294) Mehr lesen

Was ist GMT? Verifiziert

GMT steht für "Greenwich Mean Time" (manchmal auch UTC genannt, was für "Coordinated Universal Time" steht). Es ist die Zeit für den Längengrad 0, der durch Greenwich bei London verläuft.

Das war hilfreich (168) Mehr lesen

Worin besteht der Unterschied zwischen FM und AM? Verifiziert

FM und AM sind beides Modulationsarten, die zur Übertragung eines Signals verwendet werden. FM steht für "Frequency Modulation" und AM für "Amplitude Modulation". AM ist die älteste Form der Modulation. Der größte Unterschied ist, dass das FM-Signal viel stärker ist als das AM-Signal.

Das war hilfreich (167) Mehr lesen
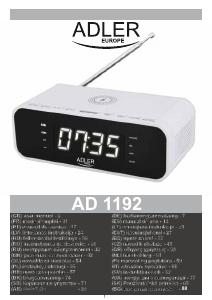
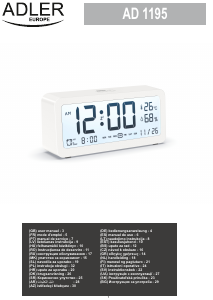
Bedienungsanleitung Adler AD 1192W Uhrenradio

Verwandte Produkte

Verwandte Kategorien

×
Download