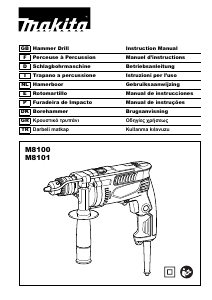
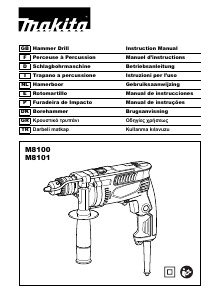
Bedienungsanleitung Makita M8100 Schlagbohrmaschine

Benötigen Sie ein Bedienungsanleitung für Ihren Makita M8100 Schlagbohrmaschine? Unten können Sie das PDF-Bedienungsanleitung kostenlos auf Deutsch ansehen und herunterladen. Für dieses Produkt gibt es derzeit 3 häufig gestellte Fragen, 0 Kommentare und 0 Stimmen. Wenn dies nicht das von Ihnen gewünschte Bedienungsanleitung ist, kontaktieren Sie uns bitte.

Ist Ihr Produkt defekt und bietet die Bedienungsanleitung keine Lösung? Gehen Sie zu einem Repair Café, wo es gratis repariert wird.

Bedienungsanleitung

Loading…

4
Installing or removing drill bit
CAUTION:
Always be sure that the tool is switched off and
unplugged before installing or removing the bit.
For Model M8100 (Fig. 2)
To install the bit, place it in the chuck as far as it will go.
Tighten the chuck by hand. Place the chuck key in each
of the three holes and tighten clockwise. Be sure to
tighten all three chuck holes evenly. To remove the bit,
turn the chuck key counterclockwise in just one hole,
then loosen the chuck by hand.
After using the chuck key, be sure to return it to the
original position.
For Model M8101 (Fig. 3)
Hold the ring and turn the sleeve counterclockwise to
open the chuck jaws. Place the bit in the chuck as far as
it will go. Hold the ring firmly and turn the sleeve
clockwise to tighten the chuck.
To remove the bit, hold the ring and turn the sleeve
counterclockwise.
Depth gauge (Fig. 4)
The depth gauge is convenient for drilling holes of
uniform depth. Loosen the side grip and insert the depth
gauge into the hole in the grip base. Adjust the depth
gauge to the desired depth and tighten the side grip.
NOTE:
The depth gauge cannot be used at the position where
the depth gauge strikes against the gear housing.
FUNCTIONAL DESCRIPTION
Switch action (Fig. 5)
CAUTION:
• Before plugging in the tool, always check to see that
the switch trigger actuates properly and returns to the
“OFF” position when released.
To start the tool, simply pull the switch trigger. Tool speed
is increased by increasing pressure on the switch trigger.
Release the switch trigger to stop. For continuous
operation, pull the switch trigger, push in the lock button
and then release the switch trigger. To stop the tool from
the locked position, pull the switch trigger fully, then
release it.
Reversing switch action (Fig. 6)
This tool has a reversing switch to change the direction
of rotation. Move the reversing switch lever to the D
position (A side) for clockwise rotation or to the E
position (B side) for counterclockwise rotation.
CAUTION:
Always check the direction of rotation before operation.
Use the reversing switch only after the tool comes to a
complete stop. Changing the direction of rotation
before the tool stops may damage the tool.
Selecting the action mode (Fig. 7)
This tool has an action mode change lever. For rotation
with hammering, slide the action mode change lever to
the right (g symbol). For rotation only, slide the action
mode change lever to the left (m symbol).
CAUTION:
Always slide the action mode change lever all the way
to your desired mode position. If you operate the tool
with the lever positioned halfway between the mode
symbols, the tool may be damaged.
OPERATION (Fig. 8)
Always hold the tool only by the handle when performing
an operation. Do not touch the metal part.
Hammer drilling operation
CAUTION:
There is tremendous and sudden twisting force exerted
on the tool/bit at the time of hole break-through, when
the hole becomes clogged with chips and particles, or
when striking reinforcing rods embedded in the
concrete. Always use the side grip (auxiliary handle)
and firmly hold the tool by both side grip and switch
handle during operations. Failure to do so may result in
the loss of control of the toll and potentially serve injury.
When drilling in concrete, granite, tile, etc., slide the
action mode change lever to the position of g symbol to
use “rotation with hammering” action. Be sure to use a
tungsten-carbide tipped bit. Do not apply more pressure
when the hole becomes clogged with chips or particles.
Instead, run the tool at an idle, then remove the bit
partially from the hole. By repeating this several times,
the hole will be cleaned out.
After drilling the hole, use the blow-out bulb to clean the
dust out of the hole.
Drilling operation
When drilling in wood, metal or plastic materials, slide the
action mode change lever to the position of m symbol to
use “rotation only” action.
Drilling in wood
When drilling in wood, the best results are obtained with
wood drills equipped with a guide screw. The guide
screw makes drilling easier by pulling the bit into the
workpiece.
Drilling in metal
To prevent the bit from slipping when starting a hole,
make an indentation with a center-punch and hammer at
the point to be drilled. Place the point of the bit in the
indentation and start drilling. Use a cutting lubricant when
drilling metals. The exceptions are iron and brass which
should be drilled dry.
CAUTION:
Pressing excessively on the tool will not speed up the
drilling. In fact, this excessive pressure will only serve
to damage the tip of your bit, decrease the tool
performance and shorten the service life of the tool.
There is a tremendous force exerted on the tool/bit at
the time of hole break through. Hold the tool firmly and
exert care when the bit begins to break through the
workpiece.
A stuck bit can be removed simply by setting the
reversing switch to reverse rotation in order to back
out. However, the tool may back out abruptly if you do
not hold it firmly.
Always secure small workpieces in a vise or similar
hold-down device.
Download Bedienungsanleitung auf Deutsch (PDF, 0.7 MB)
(Denken Sie an die Umwelt und drucken Sie diese Bedienungsanleitung nur aus, wenn es unbedingt nötig ist)

Loading…

Bewertung

Teilen Sie uns mit, was Sie über die Makita M8100 Schlagbohrmaschine denken, indem Sie eine Produktbewertung verfassen. Möchten Sie Ihre Erfahrungen mit diesem Produkt teilen oder eine Frage stellen? Hinterlassen Sie einen Kommentar am Ende dieser Seite!
Sind Sie mit Makita M8100 Schlagbohrmaschine zufrieden?
Ja Nein
Seien Sie die erste Person, die dieses Produkt bewertet
0 Bewertungen

Diskutieren Sie über dieses Produkt mit

Hier können Sie uns Ihre Meinung zu Makita M8100 Schlagbohrmaschine mitteilen. Wenn Sie eine Frage haben, lesen Sie zunächst das Bedienungsanleitung sorgfältig durch. Die Anforderung eines Bedienungsanleitung kann über unser Kontaktformular erfolgen.

Mehr zu diesem Bedienungsanleitung

Wir verstehen, dass es schön ist, ein gedrucktes Bedienungsanleitung für Ihr Makita M8100 Schlagbohrmaschine zu haben. Sie können das Bedienungsanleitung jederzeit von unserer Website herunterladen und selbst ausdrucken. Wenn Sie ein Originalhandbuch wünschen, empfehlen wir Ihnen, Makita zu kontaktieren. Möglicherweise können sie ein Originalhandbuch bereitstellen. Suchen Sie das Bedienungsanleitung Ihres Makita M8100 Schlagbohrmaschine in einer anderen Sprache? Wählen Sie auf unserer Homepage Ihre bevorzugte Sprache und suchen Sie nach der Modellnummer, um zu sehen, ob wir sie verfügbar haben.

Spezifikationen

Marke Makita
Modell M8100
Kategorie Schlagbohrmaschinen
Dateityp PDF
Dateigröße 0.7 MB

Alle Anleitungen für Makita Schlagbohrmaschinen
Weitere Anleitungen von Schlagbohrmaschinen

Häufig gestellte Fragen zu Makita M8100 Schlagbohrmaschine

Unser Support-Team sucht nach nützlichen Produktinformationen und beantwortet Ihre häufig gestellten Fragen. Sollte Ihnen ein Fehler bei den häufig gestellten Fragen auffallen, teilen Sie uns dies bitte anhand unseres Kontaktformulars mit.

Was ist der Unterschied zwischen einer Schlagbohrmaschine und einem Bohrhammer? Verifiziert

Schlagbohrmaschinen werden dazu verwendet, Löcher in Backstein- und Mörtelwände zu bohren. Wenn Sie Löcher in Betonwände bohren wollen, benötigen Sie einen Bohrhammer.

Das war hilfreich (133) Mehr lesen

Muss ich Gehörschutz tragen, wenn ich eine Bohrmaschine verwende? Verifiziert

Ja, sollten Sie. Auch wenn sich die Lautstärke einer Bohrmaschine möglicherweise je nach Marke und Modell unterscheidet, kann die Langzeitbelastung durch starken Lärm dauerhafte Gehörschäden verursachen. Aus diesem Grund ist es empfehlenswert, Gehörschutz zu tragen.

Das war hilfreich (23) Mehr lesen

Kann ich Elektrowerkzeuge in einem Schuppen oder einer Garage aufbewahren? Verifiziert

Im Allgemeinen können Sie Elektrowerkzeuge in einem Schuppen oder einer Garage aufbewahren, auch wenn es dort manchmal friert. Für die Lebensdauer des Elektrowerkzeugs ist es jedoch besser, es an einem trockenen Ort ohne große Temperaturschwankungen aufzubewahren. In einem Schuppen oder einer Garage kann es aufgrund von Temperaturunterschieden zur Bildung von Kondenswasser kommen, das Rost verursachen kann. Darüber hinaus halten akkubetriebene Geräte kürzer und laden sich bei sehr niedrigen Temperaturen schlechter auf. Um sicherzugehen, wie Ihr Elektrowerkzeug gelagert werden muss, lesen Sie die Bedienungsanleitung immer sorgfältig durch.

Das war hilfreich (8) Mehr lesen
Bedienungsanleitung Makita M8100 Schlagbohrmaschine

Verwandte Produkte

Verwandte Kategorien

×
Download