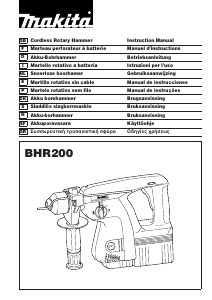
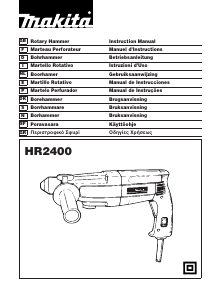
Bedienungsanleitung Makita HR2010 Bohrhammer
Benötigen Sie ein Bedienungsanleitung für Ihren Makita HR2010 Bohrhammer? Unten können Sie das PDF-Bedienungsanleitung kostenlos auf Deutsch ansehen und herunterladen. Für dieses Produkt gibt es derzeit 4 häufig gestellte Fragen, 0 Kommentare und 0 Stimmen. Wenn dies nicht das von Ihnen gewünschte Bedienungsanleitung ist, kontaktieren Sie uns bitte.
Ist Ihr Produkt defekt und bietet die Bedienungsanleitung keine Lösung? Gehen Sie zu einem Repair Café, wo es gratis repariert wird.
Bedienungsanleitung
Loading…

Loading…
Bewertung
Teilen Sie uns mit, was Sie über die Makita HR2010 Bohrhammer denken, indem Sie eine Produktbewertung verfassen. Möchten Sie Ihre Erfahrungen mit diesem Produkt teilen oder eine Frage stellen? Hinterlassen Sie einen Kommentar am Ende dieser Seite!Mehr zu diesem Bedienungsanleitung
Wir verstehen, dass es schön ist, ein gedrucktes Bedienungsanleitung für Ihr Makita HR2010 Bohrhammer zu haben. Sie können das Bedienungsanleitung jederzeit von unserer Website herunterladen und selbst ausdrucken. Wenn Sie ein Originalhandbuch wünschen, empfehlen wir Ihnen, Makita zu kontaktieren. Möglicherweise können sie ein Originalhandbuch bereitstellen. Suchen Sie das Bedienungsanleitung Ihres Makita HR2010 Bohrhammer in einer anderen Sprache? Wählen Sie auf unserer Homepage Ihre bevorzugte Sprache und suchen Sie nach der Modellnummer, um zu sehen, ob wir sie verfügbar haben.
Spezifikationen
| Marke | Makita |
| Modell | HR2010 |
| Kategorie | Bohrhämmer |
| Dateityp | |
| Dateigröße | 0.94 MB |
Alle Anleitungen für Makita Bohrhämmer
Weitere Anleitungen von Bohrhämmer
Häufig gestellte Fragen zu Makita HR2010 Bohrhammer
Unser Support-Team sucht nach nützlichen Produktinformationen und beantwortet Ihre häufig gestellten Fragen. Sollte Ihnen ein Fehler bei den häufig gestellten Fragen auffallen, teilen Sie uns dies bitte anhand unseres Kontaktformulars mit.
Was ist der Unterschied zwischen einer Schlagbohrmaschine und einem Bohrhammer? Verifiziert
Schlagbohrmaschinen werden dazu verwendet, Löcher in Backstein- und Mörtelwände zu bohren. Wenn Sie Löcher in Betonwände bohren wollen, benötigen Sie einen Bohrhammer.
Das war hilfreich (196) Mehr lesenWas bedeutet Joule (J) im Zusammenhang mit Bohrhämmern? Verifiziert
Die Anzahl der Joule zeigt die Schlagenergie des Bohrhammers an. Um gleichmäßige Löcher in Beton zu bohren, genügt ein Bohrhammer mit 2,2J.
Das war hilfreich (131) Mehr lesenMuss ich Gehörschutz tragen, wenn ich eine Bohrmaschine verwende? Verifiziert
Ja, sollten Sie. Auch wenn sich die Lautstärke einer Bohrmaschine möglicherweise je nach Marke und Modell unterscheidet, kann die Langzeitbelastung durch starken Lärm dauerhafte Gehörschäden verursachen. Aus diesem Grund ist es empfehlenswert, Gehörschutz zu tragen.
Das war hilfreich (88) Mehr lesenKann ich Elektrowerkzeuge in einem Schuppen oder einer Garage aufbewahren? Verifiziert
Im Allgemeinen können Sie Elektrowerkzeuge in einem Schuppen oder einer Garage aufbewahren, auch wenn es dort manchmal friert. Für die Lebensdauer des Elektrowerkzeugs ist es jedoch besser, es an einem trockenen Ort ohne große Temperaturschwankungen aufzubewahren. In einem Schuppen oder einer Garage kann es aufgrund von Temperaturunterschieden zur Bildung von Kondenswasser kommen, das Rost verursachen kann. Darüber hinaus halten akkubetriebene Geräte kürzer und laden sich bei sehr niedrigen Temperaturen schlechter auf. Um sicherzugehen, wie Ihr Elektrowerkzeug gelagert werden muss, lesen Sie die Bedienungsanleitung immer sorgfältig durch.
Das war hilfreich (16) Mehr lesen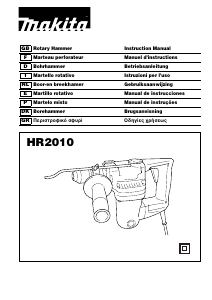
Diskutieren Sie über dieses Produkt mit
Hier können Sie uns Ihre Meinung zu Makita HR2010 Bohrhammer mitteilen. Wenn Sie eine Frage haben, lesen Sie zunächst das Bedienungsanleitung sorgfältig durch. Die Anforderung eines Bedienungsanleitung kann über unser Kontaktformular erfolgen.