
32
ENGLISH
BEFORE FIRST USE
Before using the appliance for the rst time, clean
the inner pot, the inside of the lid and all included
accessories with a damp cloth and mild detergent.
Rinse and dry them afterwards.
OPERATION
Removing the lid: (Fig. B)
Grasp the lid by the handle and turn it clockwise
to unlock. Carefully lift the lid to open it.
Attaching the lid: (Fig. C)
Place the lid on the pressure cooker - you may
need to reposition the lid to make it t properly.
Then turn it counterclockwise to lock it in place.
COOKING:
1. Open the lid and put the food and liquid into
the inner pot according to your recipe. Make
sure the pot is lled at least to the 1/5 mark but
never exceed the 4/5 mark. If you are preparing
food that expands during cooking, such as
beans and rice, do not ll the pot above the
3/5mark.
2. Check that the outside of the inner pot and the
seal ring of the lid are clean before closing the
lid.
3. Make sure that the pressure limit valve (1)
is attached properly and the oat valve (3)
is in the down position. Point the pressure
limit valve to the “CLOSE” or “OPEN” position
according to your program choice. (See the
“PRESET COOKING PROGRAMS” table for
details)
4. Connect the power cord with the power outlet.
The control panel will display “0000”.
5. Select the desired cooking program by
pressing the corresponding button and adjust
the cooking time with the +/- buttons. The
indicator light above the selected program
ashes 8 times, then the pressure cooker starts
the program automatically.
6. When the cooking time is over, the pressure
cooker beeps and automatically switches to
“warm” mode. This mode is designed to keep
the food warm until you are ready to release
the pressure and remove the food from the
pot. The “warm” mode can remain active for
up to 24 hours. However, for best results, it
is recommended to remove the food within
6hours of completion.
7. Press the [Warm/Cancel] button to exit “warm”
mode or cancel any running program.
Note: For programs that cook with pressure, the
set cooking time does not start until sucient
pressure is built up by preheating. Once this is the
case, the oat valve (3) lifts and the timer starts to
count down.
Pressure Release after cooking:
After cooking and cancelling the “warm” mode,
the pressure in the pot must rst be released
before the lid can be removed.
WARNING: Never attempt to force the lid open.
If the lid will not open easily, it means there is
sill pressure inside the pot that must be released
before the lid can be opened. It is safe to open the
lid, when the oat valve is in the down position.
There are two methods of pressure release:
• Natural Release - After cancelling the “warm”
mode the pressure cooker cools down and
the pressure inside slowly drops. This process
takes several minutes (usually between 10-60
minutes) depending on the amount of food in
the cooker.
• Quick Release - This method allows to release
the pressure in a short amount of time by
turning the pressure limit valve to the “OPEN”
position.
Hot steam will immediately start ejecting
from the vents. Be careful not to scald
yourself! We recommend that you cover your
hand with a dish towel when doing this.
When the pressure is released, the oat valve (3)
starts to lower. Once it is in the down position, the
lid can be opened safely.
Tip: We recommend using the “Natural Release”
method for foods with a high liquid or starch
content, as the “Quick Release” method would
cause splashing during pressure release and clog
the pressure limit valve.
PRESET SETTING DELAY TIMER:
You can set a delay time after which the cooking
pro-cess will start by following the instruction
below:
1. Press the [Preset Setting] button and adjust the
delay time using the +/- buttons. (0.5-24 hours)
2. Then select the desired cooking program and
adjust the cooking time using the +/- buttons.
Wait a few se-conds until the entry is accepted.
3. Once the delay time has elapsed the pressure
cooker will start with the cooking process.
Note: The start delay time is not applicable for the
pro-gram “Cake”.
IMPORTANT SAFETY INSTRUCTIONS
The safety of electrical appliances from FIRST
Austria complies with the recognized technical
directives and legal regulations for safety.
Nevertheless, you and the other users of the
appliance should observe the following:
• Please read these instructions carefully before
using this appliance for the rst time and keep
them for further reference.
• This product has not been designed for any
other uses than those specied in this manual.
• Before connecting the appliance to the power
source, check if the voltage indicated on the
appliance corresponds with the mains voltage
in your home. If this is not the case, contact
your dealer and do not use the appliance.
• If the appliance is grounded (protection classI),
the wall outlet and any extension to which it is
connected must also be grounded.
• Do not let the cord hang over the edge of a
table or counter. Do not let the cord touch hot
surfaces.
• Do not operate or place any part of this
appliance on or near any hot surface (such as
gas or electric burner or a heated oven).
• Ensure that the appliance is used on a rm and
at surface out of reach of children, this will
prevent from overturning and avoid damage
or injury.
• Inspect and clean the pressure limit valve and
oat valve before use.
• Do not carry the pressure cooker by the lid
handle. Use the handles on the side instead.
• To protect from electrical hazard, do not
immerse this appliance or cordset in any
liquids.
• If the appliance or the power cord shows any
signs of damage, do not operate it! Take the
product to an authorized and qualied service
center for inspection or repair.
• Do not operate the appliance emtpy.
• Do not attempt to plug in or unplug the
appliance with wet hands or feet in the water.
• This device is intended for home use only, do
not use it commercially.
• Do not use this appliance outdoors.
• Do not leave the appliance unattended while it
is operating.
• Avoid contact with hot steam during or right
after operation. Risk of scalding!
• The appliance becomes hot during operation.
Therefore, be careful not to touch any of the
hot parts.
• Do not attempt to open the lid while the oat
valve is up. This indicates that there is still
pressure in the pot.
• Extreme caution must be used when moving
an appliance containing hot liquids.
• Always disconnect the appliance from power
after use, before cleaning and in the event of a
malfunction.
• As long as the appliance is hot, it should be
supervised, even if it is not connected to the
mains. Allow the appliance to cool down fully
before cleaning and storing it.
• Do not pull directly on the power cord, rather
pull on the plug to disconnect the appliance
from the power source.
• The appliance can be used by children
aged from 8 years and above and persons
with reduced physical, sensory or mental
capabilities or lack of experience and
knowledge if they have been given supervision
or instruction concerning use of the appliance
in a safe way and understand the hazards
involved. Children shall not play with the
appliance. Cleaning and user maintenance
shall not be made by children unless they
are older than 8 and supervised. Keep the
appliance and its cord out of reach of children
less than 8 years.
• We are excluded of liability for all damages that
may arise if the appliance is used for purposes
other than originally intended or if it is used
inappropriately.
• Repairs and other work undertaken on the unit
must only be done by authorised specialist
personnel!
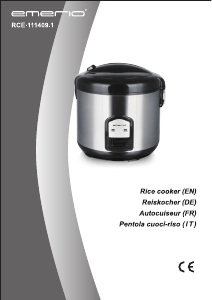
PRODUCT OVERVIEW (Fig. A)
1. Pressure limit valve
2. Lid handle
3. Float valve
4. Float valve seal ring
5. Inner pot
6. Condensate collector
7. Carrying handle
8. Control panel
9. Big seal ring (from cover plate)
10. Small seal ring (from cover plate)
11. Cover plate
12. Anti-clogging shield
CONTROL PANEL (Fig. D)
ENGLISH


Diskutieren Sie über dieses Produkt mit
Hier können Sie uns Ihre Meinung zu First Austria FA-5130 Reiskocher mitteilen. Wenn Sie eine Frage haben, lesen Sie zunächst das Bedienungsanleitung sorgfältig durch. Die Anforderung eines Bedienungsanleitung kann über unser Kontaktformular erfolgen.