Bedienungsanleitung 1byOne O00QH-0514 Alarmsystem

Benötigen Sie ein Bedienungsanleitung für Ihren 1byOne O00QH-0514 Alarmsystem? Unten können Sie das PDF-Bedienungsanleitung kostenlos auf Deutsch ansehen und herunterladen. Für dieses Produkt gibt es derzeit 0 häufig gestellte Fragen, 0 Kommentare und 13 Stimmen mit einer durchschnittlichen Produktbewertung von 69/100. Wenn dies nicht das von Ihnen gewünschte Bedienungsanleitung ist, kontaktieren Sie uns bitte.

Ist Ihr Produkt defekt und bietet die Bedienungsanleitung keine Lösung? Gehen Sie zu einem Repair Café, wo es gratis repariert wird.

Bedienungsanleitung

Loading…

- 01 - - 02 -
EN
DE
FR
ES
IT
EN
DE
FR
ES
IT
Voltage of receiver
Voltage of PIR sensor
PIR sensor’s frequency
PIR sensor’s detecting angle
PIR sensor’s detecting distance
Operating range
Power consumption
Receiver’s ring volume
Working temperature
DC 6V ( 3 x Type C batteries or adapter)
DC4.5V ( 3 x AAA batteries)
433.92MHz+100KHz
45 degree
5-8m/12-15ft
100m/300ft (without obstacles)
Receiver: 1.2W PIR sensor: 0.06W
Over 100dB within 0.5m/1.6ft
-20°C ~ 50 °C
Parameters:
Thank you for purchasing 1byone Wireless Alert
Alarm. Please read this instruction manual before
use to ensure safe operation.
If any package contents are visibly damaged or missing,
please immediately contact 1byone Support Center at
https://www.1byone.com/Support for assistance.
2 x PIR sensors 1 x Receiver
4 x Wall plugs 4 x Screws
1 x Instruction manual
(1) LED indicator ( 2) Speaker
(3) DC power input jack (4) Door chime and alarm switch
(5) On/Off switch (6) Sound and flash switch
(7) Pairing button (8) PIR detector
(9) LED indicator
1. Package Contents:
2. Parts Names:
(1)
(2)
CHIME
LOW
ALARM
(3)
(4)
OFF
ON
(5)
(6)
(7)
(8)
(9)
PIR sensor:
The PIR sensor is powered by 3 x AAA batteries,
please insert the batteries using the following
procedure:
·Remove the screw on the back of the PIR sensor
with a screwdriver. Next, remove the battery
compartment cover.
·Insert 3 x AAA batteries into the battery
compartment, using the correct polarity to
eliminate the danger of fire.
·Replace the battery compartment cover and
tighten the screw.
3. Power Supply:
Receiver:
The receiver can be powered by 3 x type C batteries
or by an adapter (output: DC 6V).
a. If powered by batteries, please insert the batteries
using the following procedure:
·Remove the screws on the back of the receiver
with a screwdriver. Next remove the battery
compartment cover.
·Insert 3 x C type batteries into the battery
compartment, using the correct polarity to
eliminate the danger of fire.
·Replace the battery compartment cover and
tighten the screw.
b. If powered by an adapter (recommended adapter
SKU OUS00-0278): Insert the adapters connector
into the DC power input jack on the side of the
receiver, then plug into a power outlet.
Safety Note:
For the receiver:
·Be sure to remove all batteries before connecting
to the adapter and plugging into a safe power
outlet.
·Do not expose the receiver to water spray or
water drops and do not place liquid-filled objects
such as vases or opened drink containers on or
near the receiver and the power outlet.
·If power by batteries, replace them when
exhausted with the same type and voltage
battery.
·Remove the batteries or unplug the adapter from
the power outlet if the Alarm kit is not to be used
for an extended period of time.
For the PIR sensor:
·The PIR sensor is powered by 3 x AAA batteries.
When exhausted, replace it using the same type
and voltage batteries.
·Always insert the batteries using the correct
polarity to eliminate the danger of fire.
·Keep old and new batteries away from children.
·Old batteries should be properly disposed using
safe environmental practices.
·Remove the batteries from the PIR sensor if you
do not intend to use the Alarm kit for an
extended period of time.
Low voltage indication: When the batteries are
exhausted, the LED indicator on the receiver and PIR
sensor will flash once every second to remind you to
replace the batteries.
Download Bedienungsanleitung auf Deutsch (PDF, 3.06 MB)
(Denken Sie an die Umwelt und drucken Sie diese Bedienungsanleitung nur aus, wenn es unbedingt nötig ist)

Loading…

Bewertung

Teilen Sie uns mit, was Sie über die 1byOne O00QH-0514 Alarmsystem denken, indem Sie eine Produktbewertung verfassen. Möchten Sie Ihre Erfahrungen mit diesem Produkt teilen oder eine Frage stellen? Hinterlassen Sie einen Kommentar am Ende dieser Seite!
Sind Sie mit 1byOne O00QH-0514 Alarmsystem zufrieden?
Ja Nein
69%
31%
13 Bewertungen

Diskutieren Sie über dieses Produkt mit

Hier können Sie uns Ihre Meinung zu 1byOne O00QH-0514 Alarmsystem mitteilen. Wenn Sie eine Frage haben, lesen Sie zunächst das Bedienungsanleitung sorgfältig durch. Die Anforderung eines Bedienungsanleitung kann über unser Kontaktformular erfolgen.

Mehr zu diesem Bedienungsanleitung

Wir verstehen, dass es schön ist, ein gedrucktes Bedienungsanleitung für Ihr 1byOne O00QH-0514 Alarmsystem zu haben. Sie können das Bedienungsanleitung jederzeit von unserer Website herunterladen und selbst ausdrucken. Wenn Sie ein Originalhandbuch wünschen, empfehlen wir Ihnen, 1byOne zu kontaktieren. Möglicherweise können sie ein Originalhandbuch bereitstellen. Suchen Sie das Bedienungsanleitung Ihres 1byOne O00QH-0514 Alarmsystem in einer anderen Sprache? Wählen Sie auf unserer Homepage Ihre bevorzugte Sprache und suchen Sie nach der Modellnummer, um zu sehen, ob wir sie verfügbar haben.

Spezifikationen

Marke 1byOne
Modell O00QH-0514
Kategorie Alarmsysteme
Dateityp PDF
Dateigröße 3.06 MB

Alle Anleitungen für 1byOne Alarmsysteme
Weitere Anleitungen von Alarmsysteme
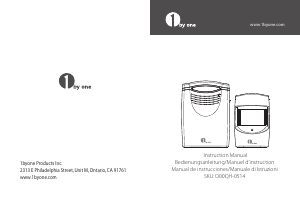
Bedienungsanleitung 1byOne O00QH-0514 Alarmsystem

Verwandte Produkte

Verwandte Kategorien